Tummy Time!

tummy+time+with+trucks.jpg

I’m sure you have heard that Tummy Time is important for your baby.

What you may not know is how much Tummy Time you should do, what that exactly means, or why it is important. Tummy Time helps babies strengthen their back, neck, shoulder and eye muscles to reach developmental milestones such as sitting, crawling, eating, and visual tracking. It also helps children later in life to function in school settings because all of those skills relate back to their developmental milestones. Tummy Time also prevents plagiocephaly or flat head syndrome.

You may notice that your infant has automatic movements that OTs refer to as reflexes. We all have reflexes and they begin in utero and help newborns travel through the birth canal and immediately feed by suckling and eventually sucking.

Reflexes also help the infant move against gravity and pair their vision to movement, to name a few purposes our reflexes serve. As babies grow, these reflexes become integrated to allow for more complex movements. Tummy Time helps with this because babies are feeling the force of gravity and how their movements can develop when placed in this position.

IMG_1427.JPG

So how much Tummy Time should you do?

0-3 months:

The American Academy of Pediatrics recommends up to 1 hour of Tummy Time per day up to 3 months old. This is done over the course of the day and can be done in small increments.

Here are a few ideas:

lay your infant on your lap to burp them, carry them in a football hold, lay down facing your infant so they can see you and hear you while you talk to them, place them on the tummy after each diaper change for a quick minute. You should notice that your infant can lift their head somewhat while on their tummy.

By 3 months of age you can bolster your infant during Tummy Time by placing a rolled up towel under their chest with their chin and arms over it. Always supervise your baby during Tummy Time and especially when using a bolster. Side lying is another position that can be used with your 3 month old. Use a rolled up towel to support  the baby’s back and be sure the arms are out in front to encourage reaching.

Side lying tummy time- use a rolled up towel behind the baby.

Side lying tummy time- use a rolled up towel behind the baby.

4-6 months:

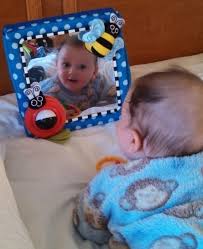
This is a good time to use a mirror during Tummy Time! By now your infant will be able to push up onto their forearms and lift their head 90 degrees. You can use black and white picture cards or prop a board book up for them to look at. At 5 months they will begin to push up on their hands and straighten the arms and even reach for a toy while on their tummy. By 6 months they may be moving in a circle while on their tummy or rolling over on each side. Around 5-6 months your child may start sitting up, bringing their hands and toes to midline, and holding objects in midline to look at. When held by the hands and pulled to sit by a caregiver, your child’s head should be in line with the body. Tummy Time helps build all of these muscles in the back and neck!

tummy time with mirror.jpeg

7-9 months:

By now your child may be pushing up to all 4s in Tummy Time, rocking back and forth, and starts crawling. Oftentimes, commando crawl happens first, with the baby moving forward on forearms. Look for symmetry when crawling. If your child is scooting, moving one leg out more than the other or fails to move the hands and knees in a bilateral manner, consult with your pediatrician.

IMG_8747.jpg

10-12 months:

By now your child may be on the move! They may cruise using furniture to move around in standing, walk with two hands held and then one hand. It is still important however to play games with your child on all 4s in a crawling position! There is immense sensory feedback happening when your child is touching different textures and moving their limbs symmetrically. A play tunnel is a great way to keep crawling and building these skills even if it is mastered and they are on to walking!

Keep kiddos crawling even beyond 1 year of age!

Keep kiddos crawling even beyond 1 year of age!


Remember to consult with your pediatrician if you have any concerns about your child. Avoid Tummy Time after eating. Keep it fun and a time for connection with your baby!

IMG_2400.jpg

Picky Eaters

 
IMG_7110.JPG
 

There are many reasons why toddlers are picky eaters. I won’t go into each cause but I will give you some strategies to try if you do happen to have a picky eater. Please note that I am not going into detail if your child has a Pediatric Feeding Disorder. Please consult with your physician. My hope is that with these tips you will gain some strategies to help your kiddo if they are a selective eater.

This reminds me of the book series “If You Give a Mouse a Cookie.” Chances are, if you have a toddler, you have a picky eater. In many ways it is developmentally appropriate. They are asserting their independence to choose to eat the foods that they like. And you have probably discovered that you can’t force a child to eat. As the saying goes, “You can lead a horse to water but you can’t make them drink….”

 
IMG_4025.jpg
 

Here are some simple tips you can try to help your child expand their food repertoire…

  1. Offer choices.

    Veggies are usually the main culprit amongst picky eaters. You can see on the picture above with the 4 plates from kiddos ages 2-4 that veggies are left. You can offer a choice between 2 vegetables. Do you want carrots or peas? It’s not a fruit OR a veggie but a veggie that they have the power to choose within the limits you are providing. You can also see that the quinoa mixture wasn’t eaten. You can also give children the choice to mix their foods by deconstructing it- a sandwich: give them the bread and the nut butter to spread themselves, salad: lettuce with the toppings on the side, quinoa or rice mixture: add nuts or beans or cheese on the side for them to add. You get the idea…

  2. Exposure.

    You may have heard that it takes repeated exposure for a child to try a new food. There is not a hard and fast guaranteed number, although it is usually around 14 times that a child is presented the food will they actually accept it. By putting the non-preferred food on the plate with the preferred food will allow your child to slowly adjust to it. Whether it is the extreme case of your child not wanting it anywhere near them (successively place it closer with each meal), or they will not touch the food, it is all about baby steps. The goal is for them to have a healthy relationship with food and see new and novel foods as something exciting. It is not to make eating something scary. You can also present foods with different dips to try. Show them how to eat it with the various dips. Once your child is comfortable with touching a food, smelling a food, placing it near the lips to “kiss it,” encourage them to taste it with you. Eating is a social activity. You can also use fun toothpicks or tongs to introduce very very small tastes of food! How daunting would it be even as an adult if someone came at you with a huge piece of a new or non-preferred food for you to try?!

  3. Eat with your kids.

    Have you gone to dinner with friends only for everyone to say, “I’m just having a drink.” It is no fun to eat alone. Eat with your kids! If they are eating dinner early, you may not want to eat a full dinner but grab some carrots and hummus and model eating. Especially non-preferred foods. While you eat you can talk about the sensory aspects of the food. How it feels in your mouth. The sound of the crunch. If you don’t like the way it feels in your mouth… Talk about how we as adults try new foods and how scary it can be even for us!

  4. Serve an appropriate amount of food.

    Your tot probably does not need as much food as you are serving. A big plate of food can feel overwhelming to them so start small and serve seconds if they finish their first appropriate size serving. Just put a few pieces on their plate and you will be amazed what happens!

    Here is a link to a great resource for serving size by age

    https://www.childrens.com/health-wellness/recommended-serving-size-by-age

    In a nutshell, think of a deck of cards for protein, a yo-yo for grains and veggies.

  5. Cook and serve foods a different way.

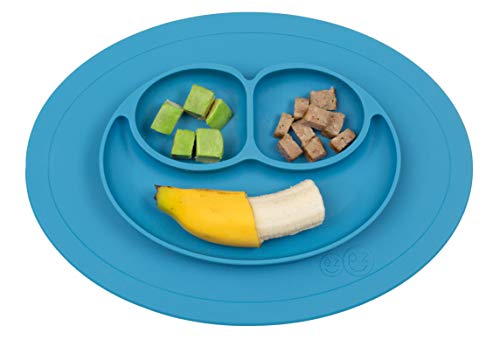
    Show your child how the way a food is cooked can change the texture. Steam carrots, roast carrots, puree, grate, cut in a circle, use a mandolin. There are so many ways to change up how you are preparing and serving foods. This appeals to kiddos who are sensitive to textures as well. If your child doesn’t like mushy try serving applesauce with a graham cracker stick to dip. If they have a hard time taking a bite out of something try cutting apples into thin matchsticks. You can serve foods in ice cube trays or muffin tins to make the serving size small and let them eat in any order they choose!

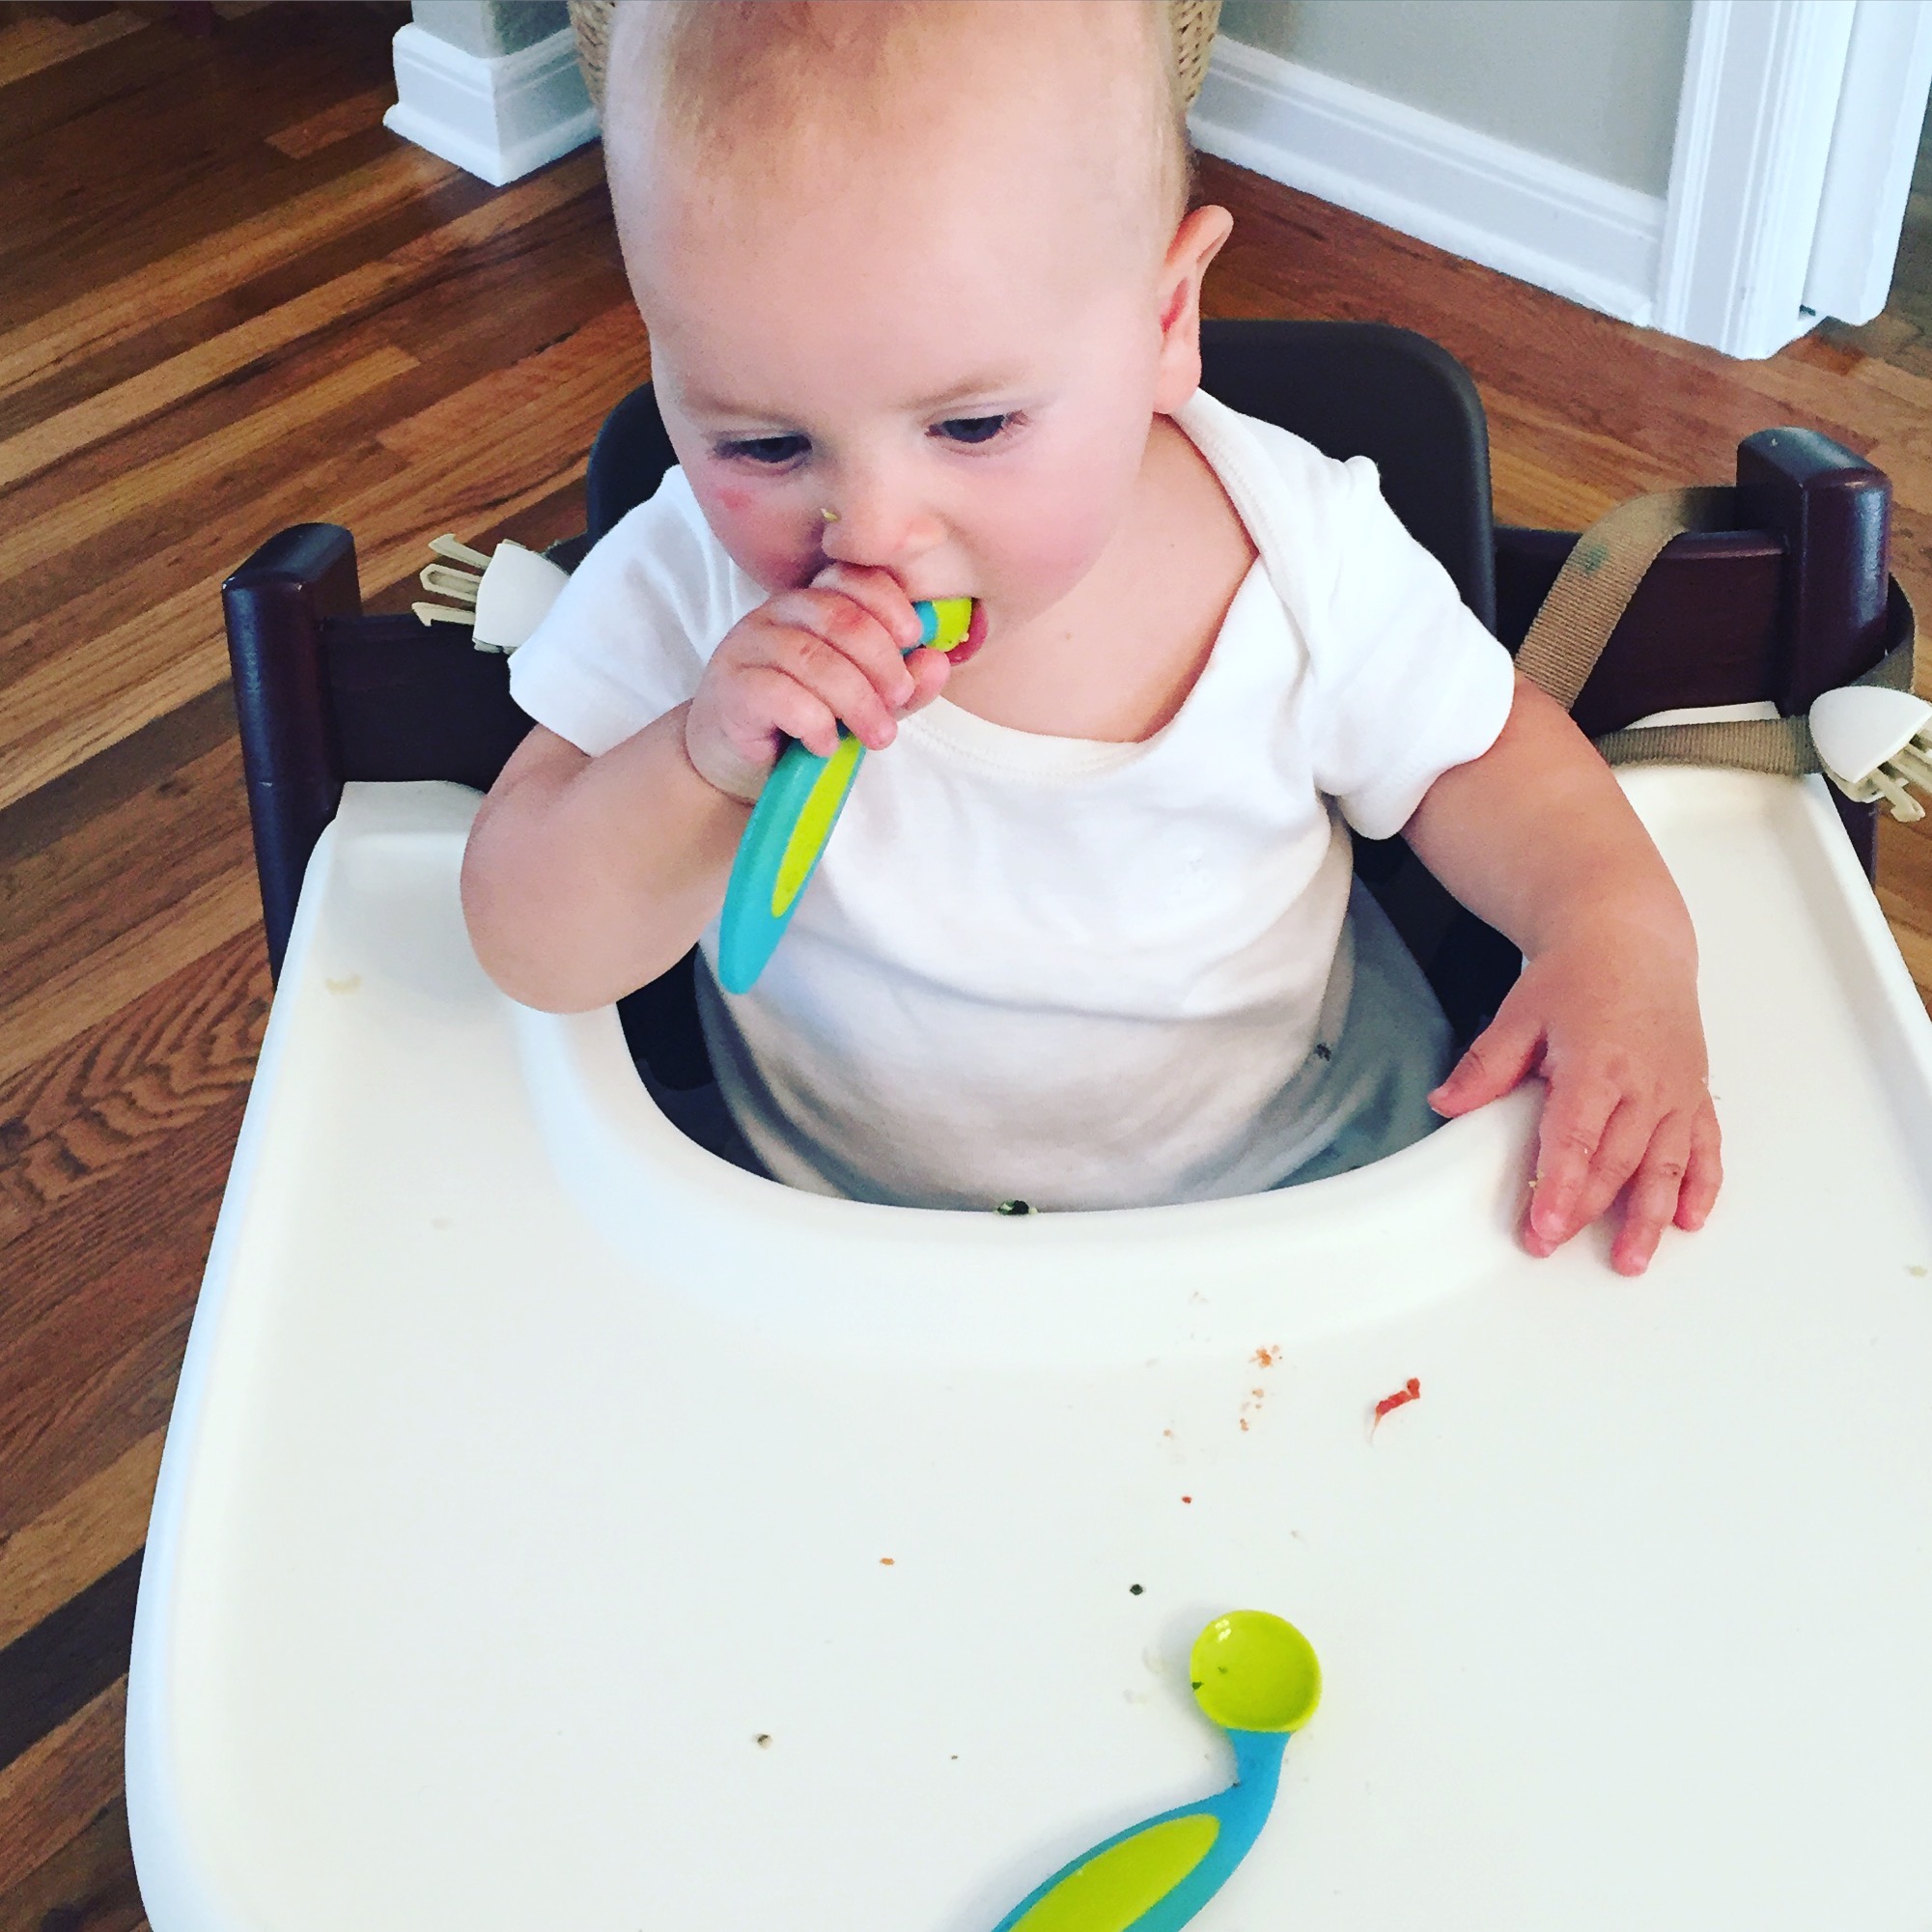
    You can also give your small child a spoon to hold when you are feeding them so they feel that they are part of the meal and it helps teach self-feeding. Sure it may be messier but this gets them excited and willing to eat when they have control over it!

 
IMG_2887.jpg
 

6. Re-think Snacks.

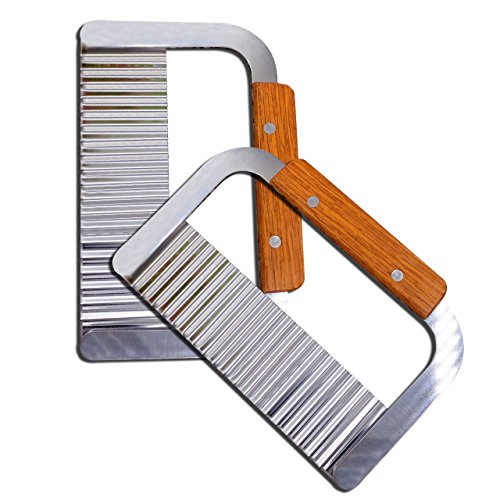
This tip stuck with me from the book, It’s Not About the Broccoli. When you are serving a snack, bring a non-preferred food. A bag of carrots always goes over well when my kids are getting hangry and calling out “mom I’m SO hungry! Can I have a snack?” This works best when we are out and about and the options are limited. If all I have to offer is carrots and a fruit, chances are both will get eaten. The same thing happens at home right before dinner. It is inevitable. You are cooking dinner and the kids come into the kitchen “mom I’m starving!” I always offer carrots or cucumbers and they know that is the only option. Usually they will still ask for something else and my answer is that they can have it after dinner. Sometimes by the end of dinner they have completely forgotten about it!

Here is the fun tool I use to cut veggies!

7. Dessert

Try placing a small “dessert” on the plate with dinner. This will help children see that dessert can be part of the meal, not this grand finale or a necessary end to a meal. Dessert does not need to be ice cream, cookies, or chocolate. It can be fruit or cheese, dried fruit, or yogurt. Soon your child may even save it for last but realize that all things in moderation have their place. What if your child only eats the sweet thing on their plate? This is the perfect opportunity to talk about what food does for us. How it fuels us and helps our body work at it’s best. This is also an opportunity to lay some ground rules for your family meals- wait until everyone is done eating (or mostly done), ask to be excused, eat around your plate trying each item, clear your plate when you are finished.

Most importantly, remember to teach your child that eating is fun. Talk about how food works to give us nutrients. Here is a great book to show this:

I hope that these tips help with your selective eater. Remember that if your child has a more serious Pediatric Feeding Disorder or refuses to eat food with any nutritional value, please talk to your pediatrician. I am happy to answer questions that you have so please leave a comment and share with other parents of toddlers!

Back to School!

 
IMG_0658.jpg
 

It is hard to believe that back-to-school time is almost here! Transitions between seasons, especially ending summer fun and settling into the routine of school, can be challenging for both the parent and child. Whether you are starting back to preschool, elementary school, or even home school here are 5 tips that will help smooth the transition.

  1. If it’s your child’s first time at the campus, visit ahead of time.

    Go play on the playground these last weeks of summer. Check out where the bathrooms are, where they might sit to eat lunch, if you will drop off- show your child the drop off and pick up location.

  2. Send them to school with a family picture or something special.

    If you have a child who typically has a difficult time separating from you or feels anxious in new settings, send a family photo with them to keep in their backpack or cubby. Some preschool classes will even showcase these somewhere in the classroom to help children so they can always visit it during the day or see the photo up on the board. You can also choose a special smooth rock for them to hold in their pocket or backpack that they can inconspicuously rub if they are missing a parent or feeling anxious. This provides a great opportunity to talk about some of these feelings with your child.

  3. Make a social story.

    Social stories are a fantastic tool to help children process new situations. They are simple stories with pictures that help children understand what is going to happen, what is expected, and is accessible to them to flip through on their own or read with an adult. There are some great resources available online. Here are a few to check out!

    https://www.pbisworld.com/tier-2/social-stories/

    https://www.andnextcomesl.com/2018/08/free-social-stories-about-going-to-school.html

    There are also some wonderful books to help children prepare for preschool and elementary school. Here are some of my favorites:

    The Kissing Hand by Audrey Penn

    A Bad Case of Stripes by David Shannon

    First Day Jitters by Julie Danneberg

    Be sure to check out my dear friend’s posts over at www.childrenslitlove.com or on Instagram @childrenslitlove for more back to school books!

  4. Create a routine.

    This is an important step for both the child and the caregiver. It can be hard to wake up earlier, leave the house on time, and leave with everything you need. Utilize the power of lists to make this easier. For your child, this could mean drawing simple pictures on a white board showing the morning routine. As your child learns to read, writing short and simple words will help them follow a morning routine. Set out clothes in the morning to minimize clothing squabbles.

    For the adult, if making lists helps you bring your A-game, be sure to put it in a place where you will surely see it will ensure that necessary items are packed, important dates are not forgotten, and due dates don’t creep up on you! Pack the car the night before if there are after-school extra curriculars to prevent rushing around in the morning.

  5. Remember the Rule of 9

    There are simply 9 minutes each day that can make a great impact on your child.

    The first 3 minutes when they wake up in the morning.

    The first 3 minutes when they come home from school.

    The last 3 minutes of the day, before bed-time.

    Use these chunks of 3 minutes to truly connect with your child. Put the phone down, do something they want to do, listen wholeheartedly. It’s just 3 minutes that will make a huge difference.

    https://powerofmoms.com/mini-podcast-three-unbelievably-simple-ideas/

 
IMG_4243.jpg
 
IMG_0001.jpg

Play as an Occupation

IMG_0192.jpg

You may have seen his quote as you scrolled through Instagram…

“Play is the work of childhood.”

Our beloved Fred Rogers that you, like me, may have grown up watching took it one step further and it couldn’t be any more spot on…

“Play is often talked about as if it were a relief from serious learning. But for children, play is serious learning.”

Before having kids, I truly didn’t realize the extent to how beneficial play is. As an OT, I knew play is the “occupation” of childhood but I would visit play-based preschools and because learning wasn’t explicit and overt, I often thought, “where is the teaching?” Well now I am humbled by my journey with my own children who have been enrolled in a play-based, nature preschool. Of course the teaching and learning is not in your face with workbooks, a circle time with do-dads and calendars from Lakeshore Learning! Rather, the teaching is happening from their environment around them and intentional teachers who observe the children and teach us parents to be observers. They have taught us how to skillfully comment on the child’s interests and ask guiding questions that instill a sense of curiosity and exploration so that learning is in their own hands. Sure, that means by age 2 a kiddo may not be able to label the colors or know their ABCS by age 3. The biggest lesson I learned is, that doesn’t matter. Children will do it on their own time. When kids in my daughter’s preschool class knew their colors at 2 years of age I thought maybe she was color blind. Honestly, I did! As a baby I would label colors for her, set out trays of all monochromatic items to “teach” her the colors. I hope you’re laughing at me right now, because boy has that been the biggest joke on me! The point is, she was not interested in being able to label her colors then. She was off scootering and observing the world around her (she has always taken in a lot about the world around her, making her VERY emotionally intuitive). But guess what, by the age of 3-3.5 she knew all of the colors. While some kids may know their ABCs by 18 months old, mine can’t point to a letter on a sign and tell me what it is, even at 3.5 years old. Kids will do these things at their own pace, not because they have done flashcards or “taught” it but because of their self-motivating interests.

IMG_0303.JPG

In 2011, Paul Tullis wrote an article in Scientific American Mind about two studies that compared what happens when children are given direct instruction about how to work a toy versus free exploration. You can probably guess the results. Both groups learned the intended use of the toy but the free exploration group went far beyond and discovered even more uses and aspects of the toy!

In the picture above, you might think “oh the boys are painting the house.” There is so much more happening too…

Not only are they painting the house, they needed to fill up their buckets with water and figure out how to do that. They learned about weight as they carried their full buckets back to the house from the water spout. They needed to wait their turn and negotiate with other children who are waiting to have a turn. They developed a story about what they are doing, they are building core strength, shoulder strength, and motor planning skills (ideation of the activity, putting the steps together, and then executing). All of these skills they are learning and working on is sort of hidden in the play.

I can give you countless examples of learning that is happening through various methods of play but I think you get the idea….

IMG_0436.jpg

Let’s talk about some of the great benefits of sensory play….

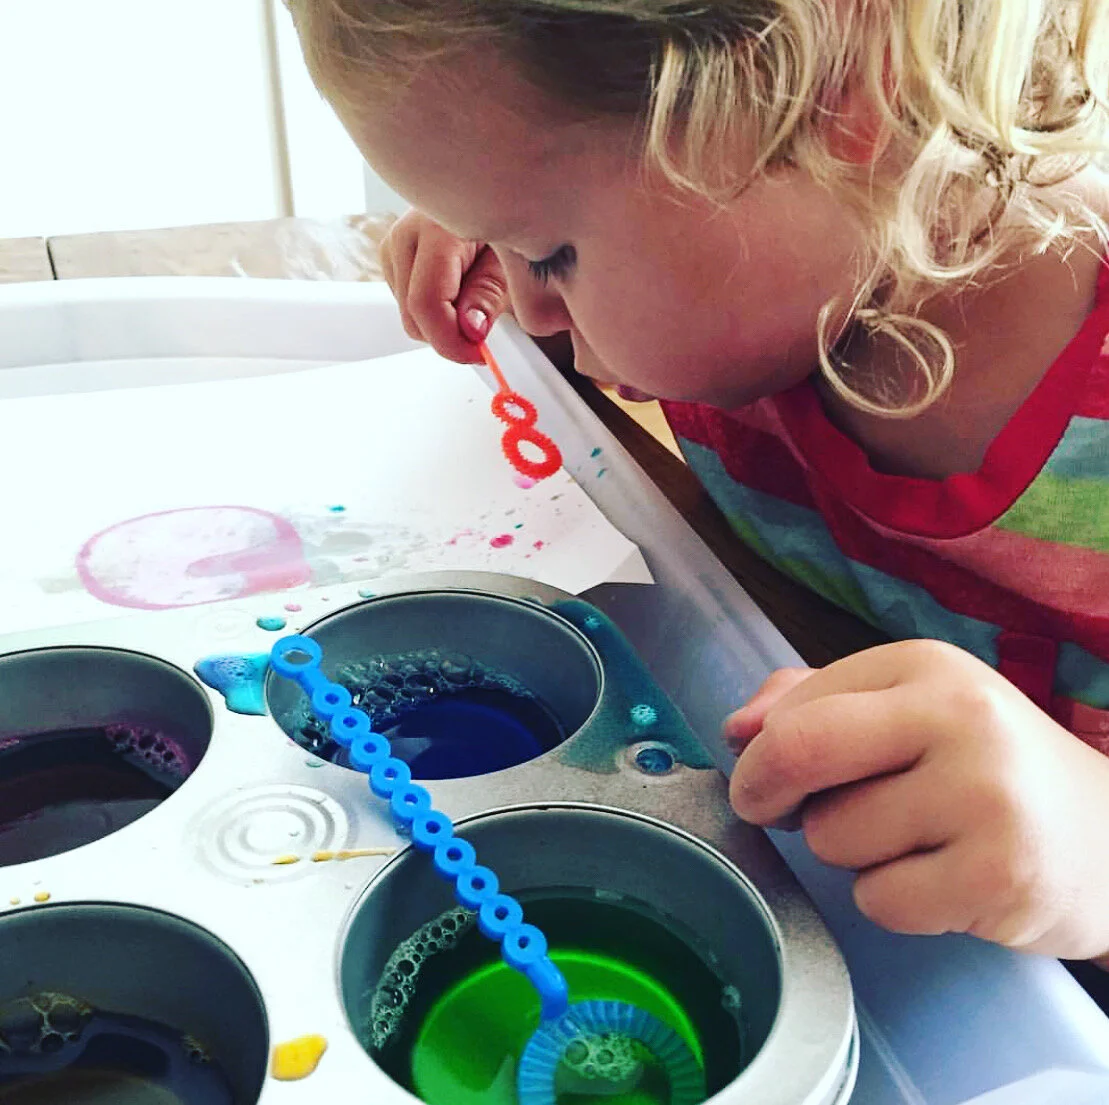
Not only do sensory bins provide immense tactile benefit and motor skill development as kids scoop and pour, smoosh and squash… when you have more than 1 child exploring a sensory bin they are navigating personal space, taking turns, exploring self-regulation (especially if one child gets hyper-aroused and the other kiddo needs to tap into some coping strategies for their own self-regulation- especially if it is a water table and one kiddo starts splashing!), developing speech skills as an observant parent asks some guiding questions such as, “I wonder if ___, what would happen if _____, I see so many colors in this bin. What do you see?” There is so much happening in this rich experience!

IMG_0411.jpg

So many skills that help children with writing can be developed beyond using paper and pencil and drilling them with writing or “learning” letters and numbers, colors and shapes. There is some need for that as children get older and especially if there is a diagnosis but the point I hope you take away is that skills and knowledge are taught through play!

So as you go about your day, I challenge you to observe what your child’s strengths are. Notice the play schemes they come up with and talk about as they play with legos, baby dolls, cars and tractors. Think about what they ARE learning as they play and what WORK they are doing through this play. Notice their interests and strengths and what your child is good at. They may not know their ABCs yet or how to do math in their head but they may be very physically or socially adept- skills that are flourishing now while other more “academic” skills are taking a back seat.

Sitting and playing cars may not be your thing or having a pretend tea party while you stare at a pile of laundry. That’s perfectly okay. Pause, watch your child, ask a guiding question or two “I wonder what would happen if…..”

Here are a few of my favorite parenting books on this if you want to read more!

The Importance of Crawling

IMG_8652.jpg

As an OT, one of the questions we always ask when obtaining a developmental history is whether or not the child crawled. We ask this because crawling is so critical to development. Crawling is this amazing trifecta of sensory systems coming together. It integrates the visual sense, proprioception, and tactile senses. Involved in crawling is motor planning or sequencing the steps the body needs to put into place to propel forward. Bilateral coordination is what makes it all happen and you have this amazing collaboration between the senses that delights both the child and parent!

Crawling is beneficial for developing gross motor skills and build a proximal base of support. You cannot have efficient fine motor skills without this strong base of support so it is essential to move the body to build this strength. Crawling builds these proximal muscles at the center of the body which in turn also facilitates the muscles that we use for breathing, eating, and talking.

Crawling also helps to integrate some of our primal reflexes such as the ATNR that develops in utero and the STNR which develops around 6 months of age to help with crawling. If these reflexes are not integrated in children (this happens when there is not enough tummy time or crawling), problems can persist with fine motor skills, posture, crossing midline, and reading.

Now, you may be saying, “ack! my child totally skipped crawling!”

That happens… but it is never too late to get a child crawling. I even have older kiddos I work with on the floor crawling through tunnels, imitating yoga poses, playing board games on their tummy, weight bearing on one hand and doing something with the other hand. All of these activities contribute to building the skills that develop with crawling. So the lesson is not to worry about the past but set your kiddo up with some fun activities to get those senses working together.

Did you know that crawling helps with reading too? When children crawl, they are integrating both hemispheres of the brain, the eyes are working together, visual tracking is happening and these are the same things that happen when we read!

IMG_3431+2.jpg

So what can you do to get your kiddo crawling? Well, one of the best tricks in the book is to get a cup of coffee or tea or whatever beverage you prefer, sit on the couch and put your legs up on the coffee table. Drape a blanket over them and invite your kiddos to come crawl through the tunnel! It is simple, fun for them, and a way to connect AND get them crawling! Now expand this to help motivate your kiddo through their morning routine, “Hey can you crawl to the bathroom and meow like a kitty?” I don’t know about your kids, but my 5 year old goes through phases of loving to pretend she is a baby again or a cat or a dog. Use this phase as an opportunity to encourage crawling!

I always have a tunnel on hand for rainy days, the witching hour, OT sessions, and tot group! This is a favorite tunnel you can snap up on Amazon…


Use what you have around the house and lay out a piece of bubble wrap or foil for them to crawl over. For little kiddos you can make a sensory box for them to crawl through and touch different textures inside (carpet pieces, cotton balls, bubble wrap, corrugated cardboard, felt, flannel fabric…)

You can also make fun games like hiding items or letters or numbers written on post-its under chairs so kids must crawl to look under. This is a super fun way to jazz up homework! Just send your teacher a note to tell her you adapted the worksheet to make it multi-sensory!

These foam wedges are great for young crawlers and toddlers and can be used in fun obstacle courses and games around the house! As your kiddo gets older, you can also get a wide wood plank and set it up outside for some natural crawling obstacles!

IMG_3530.JPG

So if you do nothing else this summer, focus on getting outside and playing back to the basics with crawling in the grass or sand, sitting on the couch to relax while the kids crawl under your man-made tunnel!

I love to hear from you- shoot me a question if you have one!

Figure Ground

Figure Ground is an important visual processing skill. We use figure ground to “see” salient information. For example, kids use this skill when they are completing math worksheets that have mixed operations (addition/subtraction/multiplication/division symbols). When searching a bookshelf for a favorite book, looking in a pencil box for something specific, or looking in their cubby or locker for an item. We use it as adults at the grocery store- I have such a problem with this- the item I am looking for is often right in front of me! We also use it looking in the pantry for an item or digging through our purse, but at least we can also use our tactile system to locate items!

Here are some helpful tools for building figure ground skills:

This took 5 minutes to quickly make- drawing flowers with sight words and letters. You can do it with numbers too, and stickers that you can pick up at the grocery store even!

This took 5 minutes to quickly make- drawing flowers with sight words and letters. You can do it with numbers too, and stickers that you can pick up at the grocery store even!

It is easy to make search and find bottles! All you need is the following:

  • Plastic water bottle (I love Voss for these but any will do)

  • Rice (you can be extra fancy and dye it with vinegar and food coloring shaken up in a bag)

  • Letter beads

  • Small figurines or items around the house

 
IMG_0557.jpg
 

I also love making sensory bins for sight words and letters. You can use any sensory bin filler- lentils, rice, beans, shredded paper from a paper shredder, kinetic sand… I used small wood rounds and wrote letters and sight words on them for the kids to find!

IMG_1595.JPG

There are lots of books that are a fun way to build figure ground skills!

Do you have other favorite search and find activities? You can even play a simple game of “I spy” when driving around. We love to do this in our family! Giving descriptive clues helps to build language skills as well!

Tactile Processing and Sensory Recipes!!!

IMG_2903.JPG

I love to make different sensory “doughs” to explore. I am including a few of my recent favorite recipes here for you to try out at home! Why is it important to explore different textures?

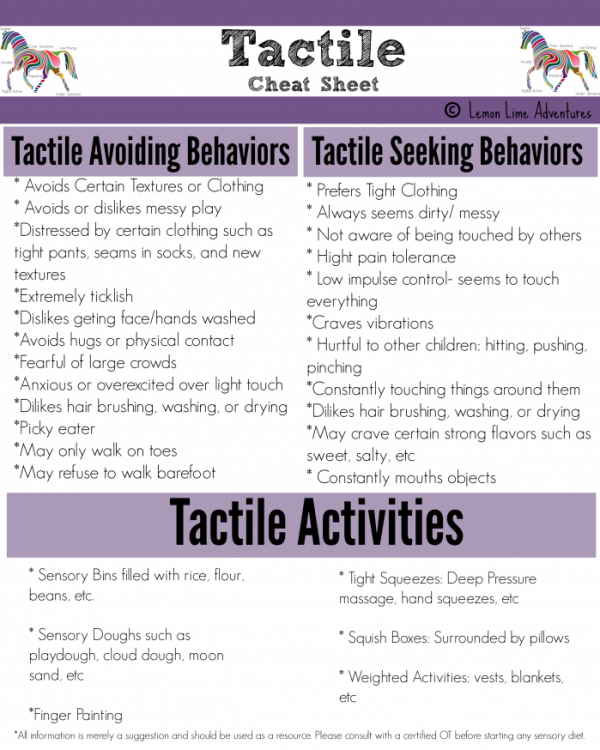
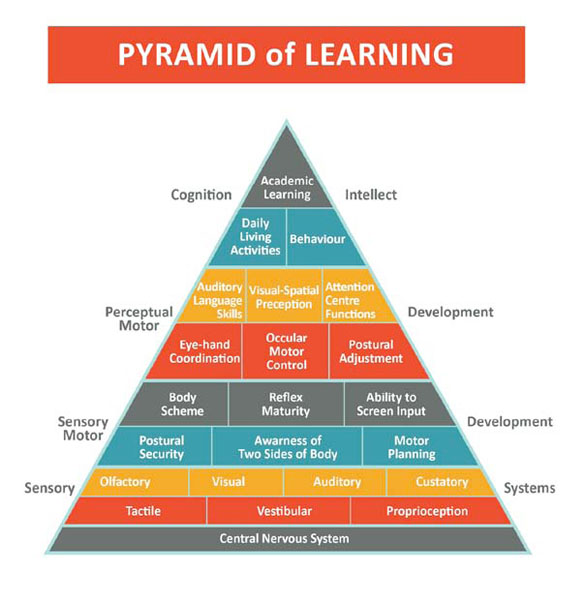
The tactile system is at the core of our sensory processing. If you saw my blog post from last week, the Sensory Pyramid image gives a depiction of tactile being one of the sensory systems that is at the bottom, or the root, of our sensory processing. Everything that is layered on top of it will be affected if tactile processing is a bit “off.” This could mean that a child is either hypo-responsive to it so they seek out extra tactile opportunities, or hyper-responsive to it and they avoid touch. Here are some common characteristics of each from Lemon Lime Adventures. She is a mother and explains it in great lay persons terms without medical terminology:

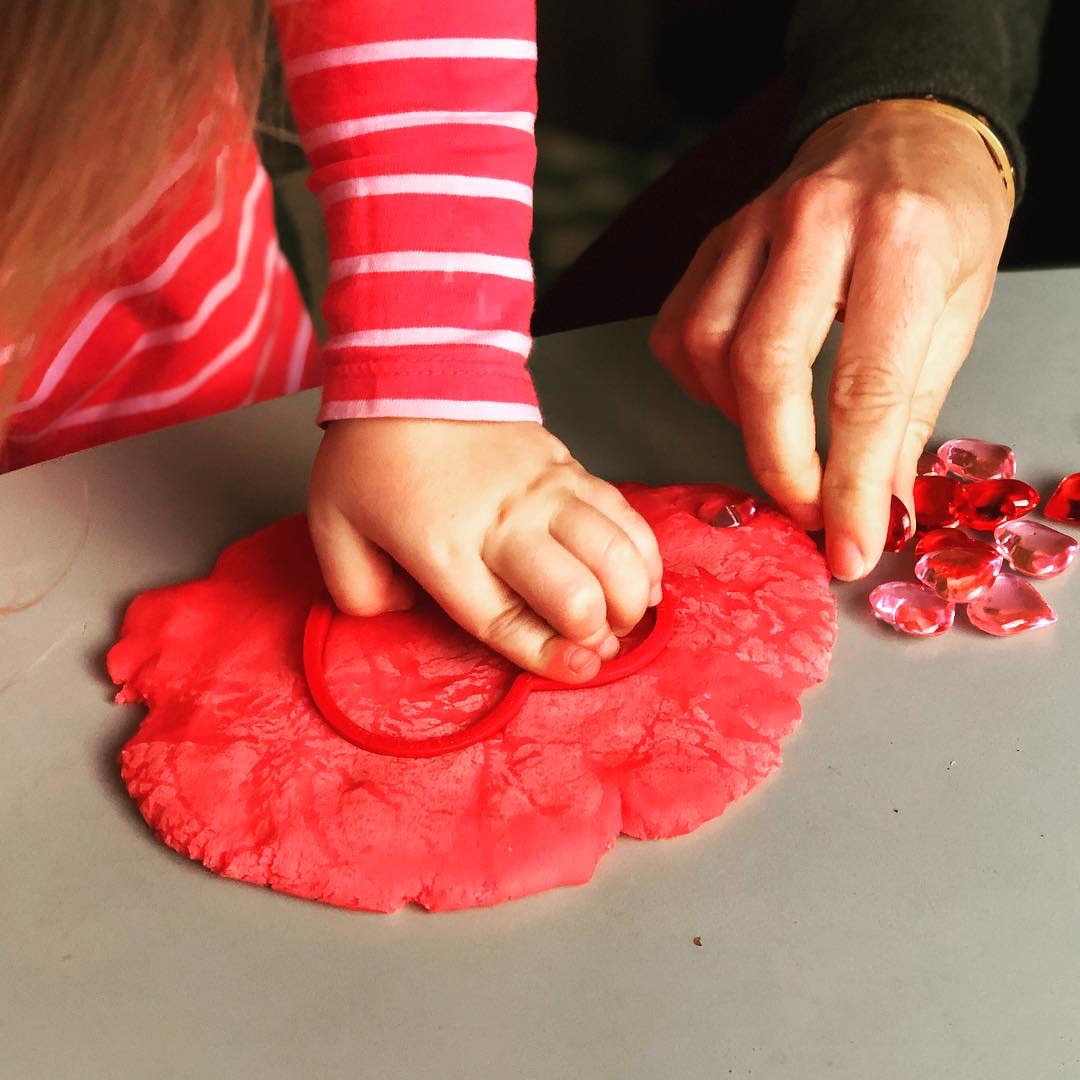
When we use our tactile sensory system, we are providing an immense amount of information to our body and brain because it is our largest sensory system. When the tactile system is functioning properly, it helps us filter out information about sensations to decipher what we need to pay attention to (a hot stove) and what we don’t (itchy tags). Some tactile input can be very noxious to children, including light touch such as tickles. Deep pressure is calming so providing activities such as warm play dough to touch and manipulate, weighted blankets or lap pads, bean bags with different materials inside to still discover different sensations without needing to touch stimuli that they might be hyper-responsive to. It is important to grade or modify tactile activities for those that are more sensitive. You can provide a paintbrush to paint in shaving cream (and eventually they might even touch it a bit), scoops for rice bins, nets for scooping!

Exposure to various tactile experiences is critical to help the tactile sensory system learn and adapt and make neural connections to process these different sensations!


“Ice Cream” Dough:

  • a tub of frosting

  • a carton of corn starch (you can also use powdered sugar)

    Mix together with an electric mixer until no longer sticky!

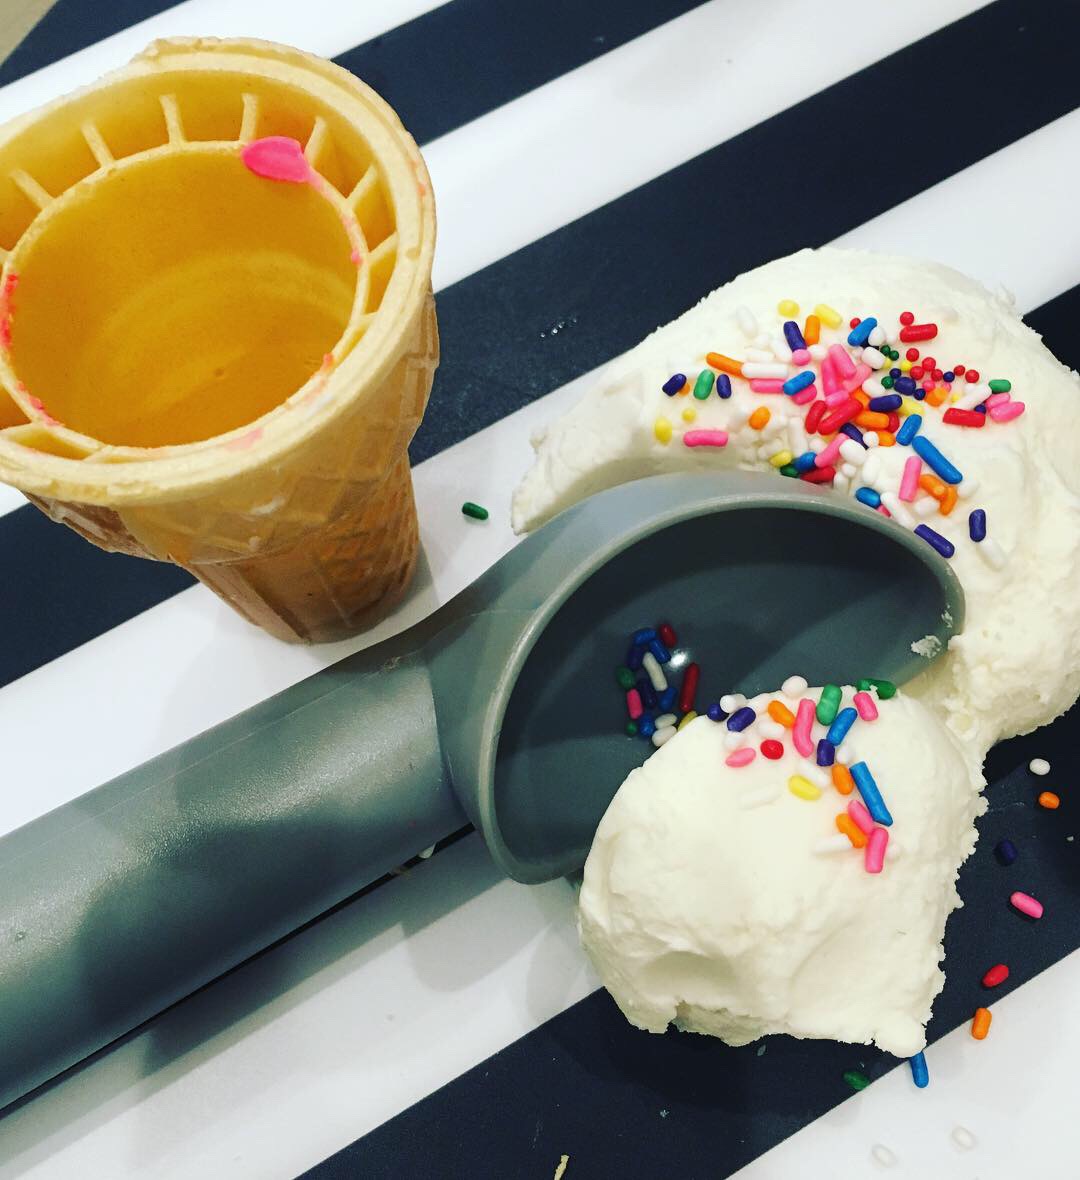
    It smells divine! Add sprinkles, real ice cream cones, and ice cream scoops to explore!


IMG_1793.JPG

Classic Play Dough:

  • 2 cups flour

  • 1 cup salt

  • 2 teaspoons cream of tartar

  • 2 tablespoons canola/ vegetable oil

  • 2 cups of water

  • food coloring

  • essential oils (if desired)

    Mix all together in a pan over medium heat. It is recommended to add food coloring and essential oils to the water before mixing in. Turn out onto a lightly floured surface and knead. Store in an airtight container when cool!

These are some of my favorite play dough tools that I recently found! They are so great for finger strength while igniting the tactile system!

I love adding essential oils for some aromatherapy- tapping into our olfactory sense can be calming and alerting. I’ve linked a few here that I use at a wholesale price from DoTerra!

I love adding essential oils for some aromatherapy- tapping into our olfactory sense can be calming and alerting. I’ve linked a few here that I use at a wholesale price from DoTerra!


Flubber!

  • 1 cup of Elmer’s glue

  • 1/2 cup room temperature water

  • 1/2 cup liquid starch

  • Food coloring

    Mix glue and water together in a container and add in food coloring. Add liquid starch into this mixture while stirring. Mix with your hands to fully incorporate!

    I love using flubber with strawberry baskets, a tennis racket, and strainers!

IMG_0390.JPG

IMG_2874.JPG

Chocolate Oobleck “Mud”:

  • 1 cup cornstarch

  • 3 tablespoons cocoa powder

  • 1/2 cup of water

    Mix together slowly. If it is too runny, add more corn starch, if it is too thick, add some more water! Play with it with some farm animals, dinosaurs, or baby dolls (then give them a soapy bath!)


Some other great activities for tactile experiences have great impacts and aren’t messy! Tactile does not need to be messy…


How does your child process tactile input? Are they painting their hands during a painting activity? Wanting to wash their hands the second something gets on it? Do they have a big response to tags? Do they have a high threshold for pain? Asking yourself some of these questions will provide clues to their tactile system! What questions do you have for me???

Have a great day!

Is it Sensory or is it Behavior?

One of the questions I ask myself the most often when I am working with children and even with my own children, is, “is it sensory or is it behavior?” Working in schools, the sensory or behavior question is a big one. It comes up almost every time I am working with a kiddo. OTs and behaviorists are often in two schools of thought about this, but truly, the two go hand in hand. It is impossible to look at a behavior without looking at the underlying sensory components.

This pyramid is an excellent depiction of the role of sensory in behaviors…

The central nervous system is at the root of an individual’s functioning. From here, the tactile, vestibular (how we feel the effects of gravity) and proprioceptive (the push and pull of force on our muscles and ligaments so we know where our body is in space) are layered on. If there is a glitch here, in these 3 components, everything else that is stacked on top in the pyramid may be off. You can see behavior is near the top of the pyramid. Each of the components below, will affect one’s behavior. If a child cannot properly feel using their tactile discrimination or is overly sensitive to touch, you might see other senses heightened. They might seek more proprioceptive input. In the classroom, this would look like moving around in their chair, leaning on the desk, being too forceful with materials. If a child lacks vestibular integration you might see them touching everything, being too close to their neighbor when seated or in line. With these examples, a behaviorist might enter a classroom and see a child doing these things and institute a positive reinforcement system for sitting upright in class. Theoretically this is great. Positive reinforcement works. But the child will fail eventually because the sensory system has not been addressed. The child needs to learn strategies and teach their sensory system about what to do to help their body so that they CAN sit up and pay attention to the teacher.

As an OT and a Board Certified Behavior Analyst (BCBA), I approach the children with whom I work in a holistic way. I try to understand the family’s values first, how they structure their days, what the routines look like, get a pulse on how they operate and what habits make up their day to day. This is a critical part of what we do as OTs- understand the habits of people and with children, and that always involves the family. Understanding family dynamics, is extended family involved, are their older and younger siblings, what role does the family play in the behaviors? This can be difficult to obtain in the first meeting, but bits and pieces can be gathered and then continue to shape the occupational history about the kiddo and their family.

In the school setting, the same approach applies. It is critical to understand the teacher’s knowledge base, what sensory strategies they are familiar with, what classroom management strategies are in place, how the class operates, and what you can do to address both the sensory aspects and the resulting behavior. A big part of this is the environment as well. OTs are able to look at these various components that affect the child’s functioning. Assessing if the environment, both at home and at school, is too stimulating visually and auditorily. How are transitions throughout the day presented and executed? What antecedent strategies are in place to help the child from a sensory perspective AND a behavioral approach? This is where OT and behavior can really go hand-in-hand and OTs can provide sensory-based strategies to help get the nervous system “ready” for a transition, a particularly challenging activity, winding down and calming the body after said activity.

I have been at behavior conferences where inevitably, behaviorists scoff at the Wilbarger brushing protocol. This is an OT strategy that is often recommended to help children with tactile sensitivity and to provide deep proprioceptive input. Some OTs include it as part of a sensory diet at school or at home. While I agree that it would fall outside of the scope of what a behavior therapist is doing- understanding the underlying principles gives both an OT and a behaviorist the opportunity to collaborate, understand the child’s sensory needs, the resulting behavior, and what strategies CAN be put in place that can be executed by anyone working with the child.

IMG_3198.JPG

I could go into many examples of when you might see a behavior and question if it is sensory-related or if it is a behavior. Instead, let these guiding questions help you discern what strategies need to be employed:

  • What time of day is it? - This could tell you if the child is tired, needs some down time, if it first thing in the morning and they had a full “good” night’s sleep you could begin to wonder if there is a sleep apnea related issue and consult your pediatrician.

  • Has the child eaten?- Did they have a balanced meal, did they just have a sugar-laden snack, was red-dye 40 in the food (there have been correlations between red food coloring and hyperactivity.

  • Was the child overstimulated?- This could be number of people, lights, they are in a big room or a very small room, is there a lot of background noise or loud noises.

  • Was the transition rushed or not explained prior to happening?- This is a big one and can even creep up at a time when you do not think that it would be an issue. Even if you think the child can be flexible or go with the flow, it is helpful to explain what is happening next or what behavior is expected of them prior to the transition.

  • Was something unexpected?- Was there an assembly at school that was not explained to the child, did the child need to leave a project or play that they were engrossed in, did something change from what they were otherwise expecting to happen?

  • Is something new?- New clothing that has not been shown to them prior to putting on could be difficult for some children to adjust to, the sensory aspects of the clothing might be noxious, the new straw cup you got them might feel different in their mouth, the new jacket has a zipper that is difficult to manipulate…

  • How is your energy as parent/ teacher/ therapist/ caregiver?- Children are so intuitive to the energy around them. Even at a young age, you might assume that they do not react to other’s emotions but they absolutely do. If you are frantic or anxious about something, chances are really good that the child or children around you feel it.

  • How is the behavior being reinforced? Is it getting a lot of your attention? Do you inadvertently strengthen it? Yesterday in 2nd grade I found myself calling on a kiddo who shouted out- it happened so automatically for both of us! Excited in the moment- neither of us could help it!

These questions above can help guide you in figuring out what is behind the behavior. Instead of then thinking about a punitive consequence to the behavior or a reward chart to shape the behavior, think about what you can do instead. Oftentimes, explaining what will happen next, what behavior is expected, what the child can do if they feel overstimulated, and teaching the appropriate replacement behavior can shape the behavior AND address the underlying sensory components. Praise goes a long way so then talking about what worked for the child (EVEN if the child is nonverbal!), what you noticed happened, what THEY noticed and how THEY felt will help strengthen that behavior so that it happens again in the future.

Tell me, what questions do you have? What examples come up when you think about this? It can be so hard to differentiate, so please comment and send me your questions!

Even 5 years late, she does not like dancing or performing!

Even 5 years late, she does not like dancing or performing!

Handwriting Tips!

You may walk into a classroom and see an assortment of pencil grips that children are using. Let me start by saying, a grip is not necessarily needed for all children. It may not even be needed if your child does not have a mature grip when writing. Let me explain a bit more…

IMG_2755.jpg

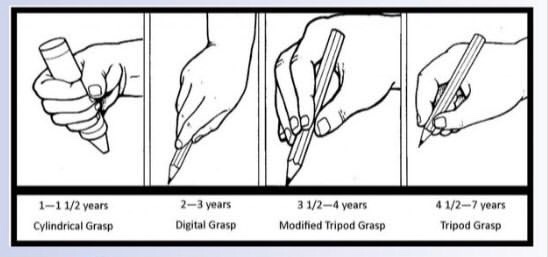
Here is a depiction of what the developmental sequence of hand grasps looks likes. You may see a 2 year old pick up a crayon with a mature modified tripod grasp. Some children naturally adjust to this grasp very early on. The hope is that these grasp patterns develop naturally when children are interacting with a variety of materials, encouraged to touch and explore, self-feed, attempt to brush their teeth, use paintbrushes to paint, and crawl and weight -bear on their hands to develop the necessary hand strength and dexterity to eventually use a mature tripod grasp.

IMG_7598.jpg

Cooking is a great way to work on a variety of hand grasps. You may see this pronated grasp or the cylindrical grasp. This is normal when strength is needed. It should not be used when a child is 3+ and attempting to write or draw.

IMG_8371.JPG

Using a variety of materials for the 2 year old age group helps to develop grasp patterns that are age-appropriate. Small crayons or these crayons that help to develop a more mature grasp and deter a cylindrical grasp is preferred! I love both of these crayon options to encourage an open web-space as well as facilitating the fingers in a more extended way rather than on “normal” crayons that make it very easy for the cylindrical grasp.

IMG_2887.jpg

Self-feeding both with just the fingers using a pincer grasp helps to develop the strength to use a mature tripod grasp on a writing tool when children are 3+. Using utensils helps to develop grasp patterns. I think it is super helpful to give kiddos a spoon to hold while you feed them to help decrease their tendency to reach for the one you are bringing fully loaded and BAM! there goes the food everywhere! Eventually then they begin to bring the spoon to their mouth independently very early on! Self-feeding with a pincer grasp (thumb and pointer/ index finger) helps to strengthen the webspace and the palmar arch. It also helps to prevent hyperextension of the thumb.

More on that later… keep reading…. :)

These bendable spoons were my favorites when the kids were small and learning to self-feed. You can bend it to accommodate the right or left hand.

IMG_0532.jpg

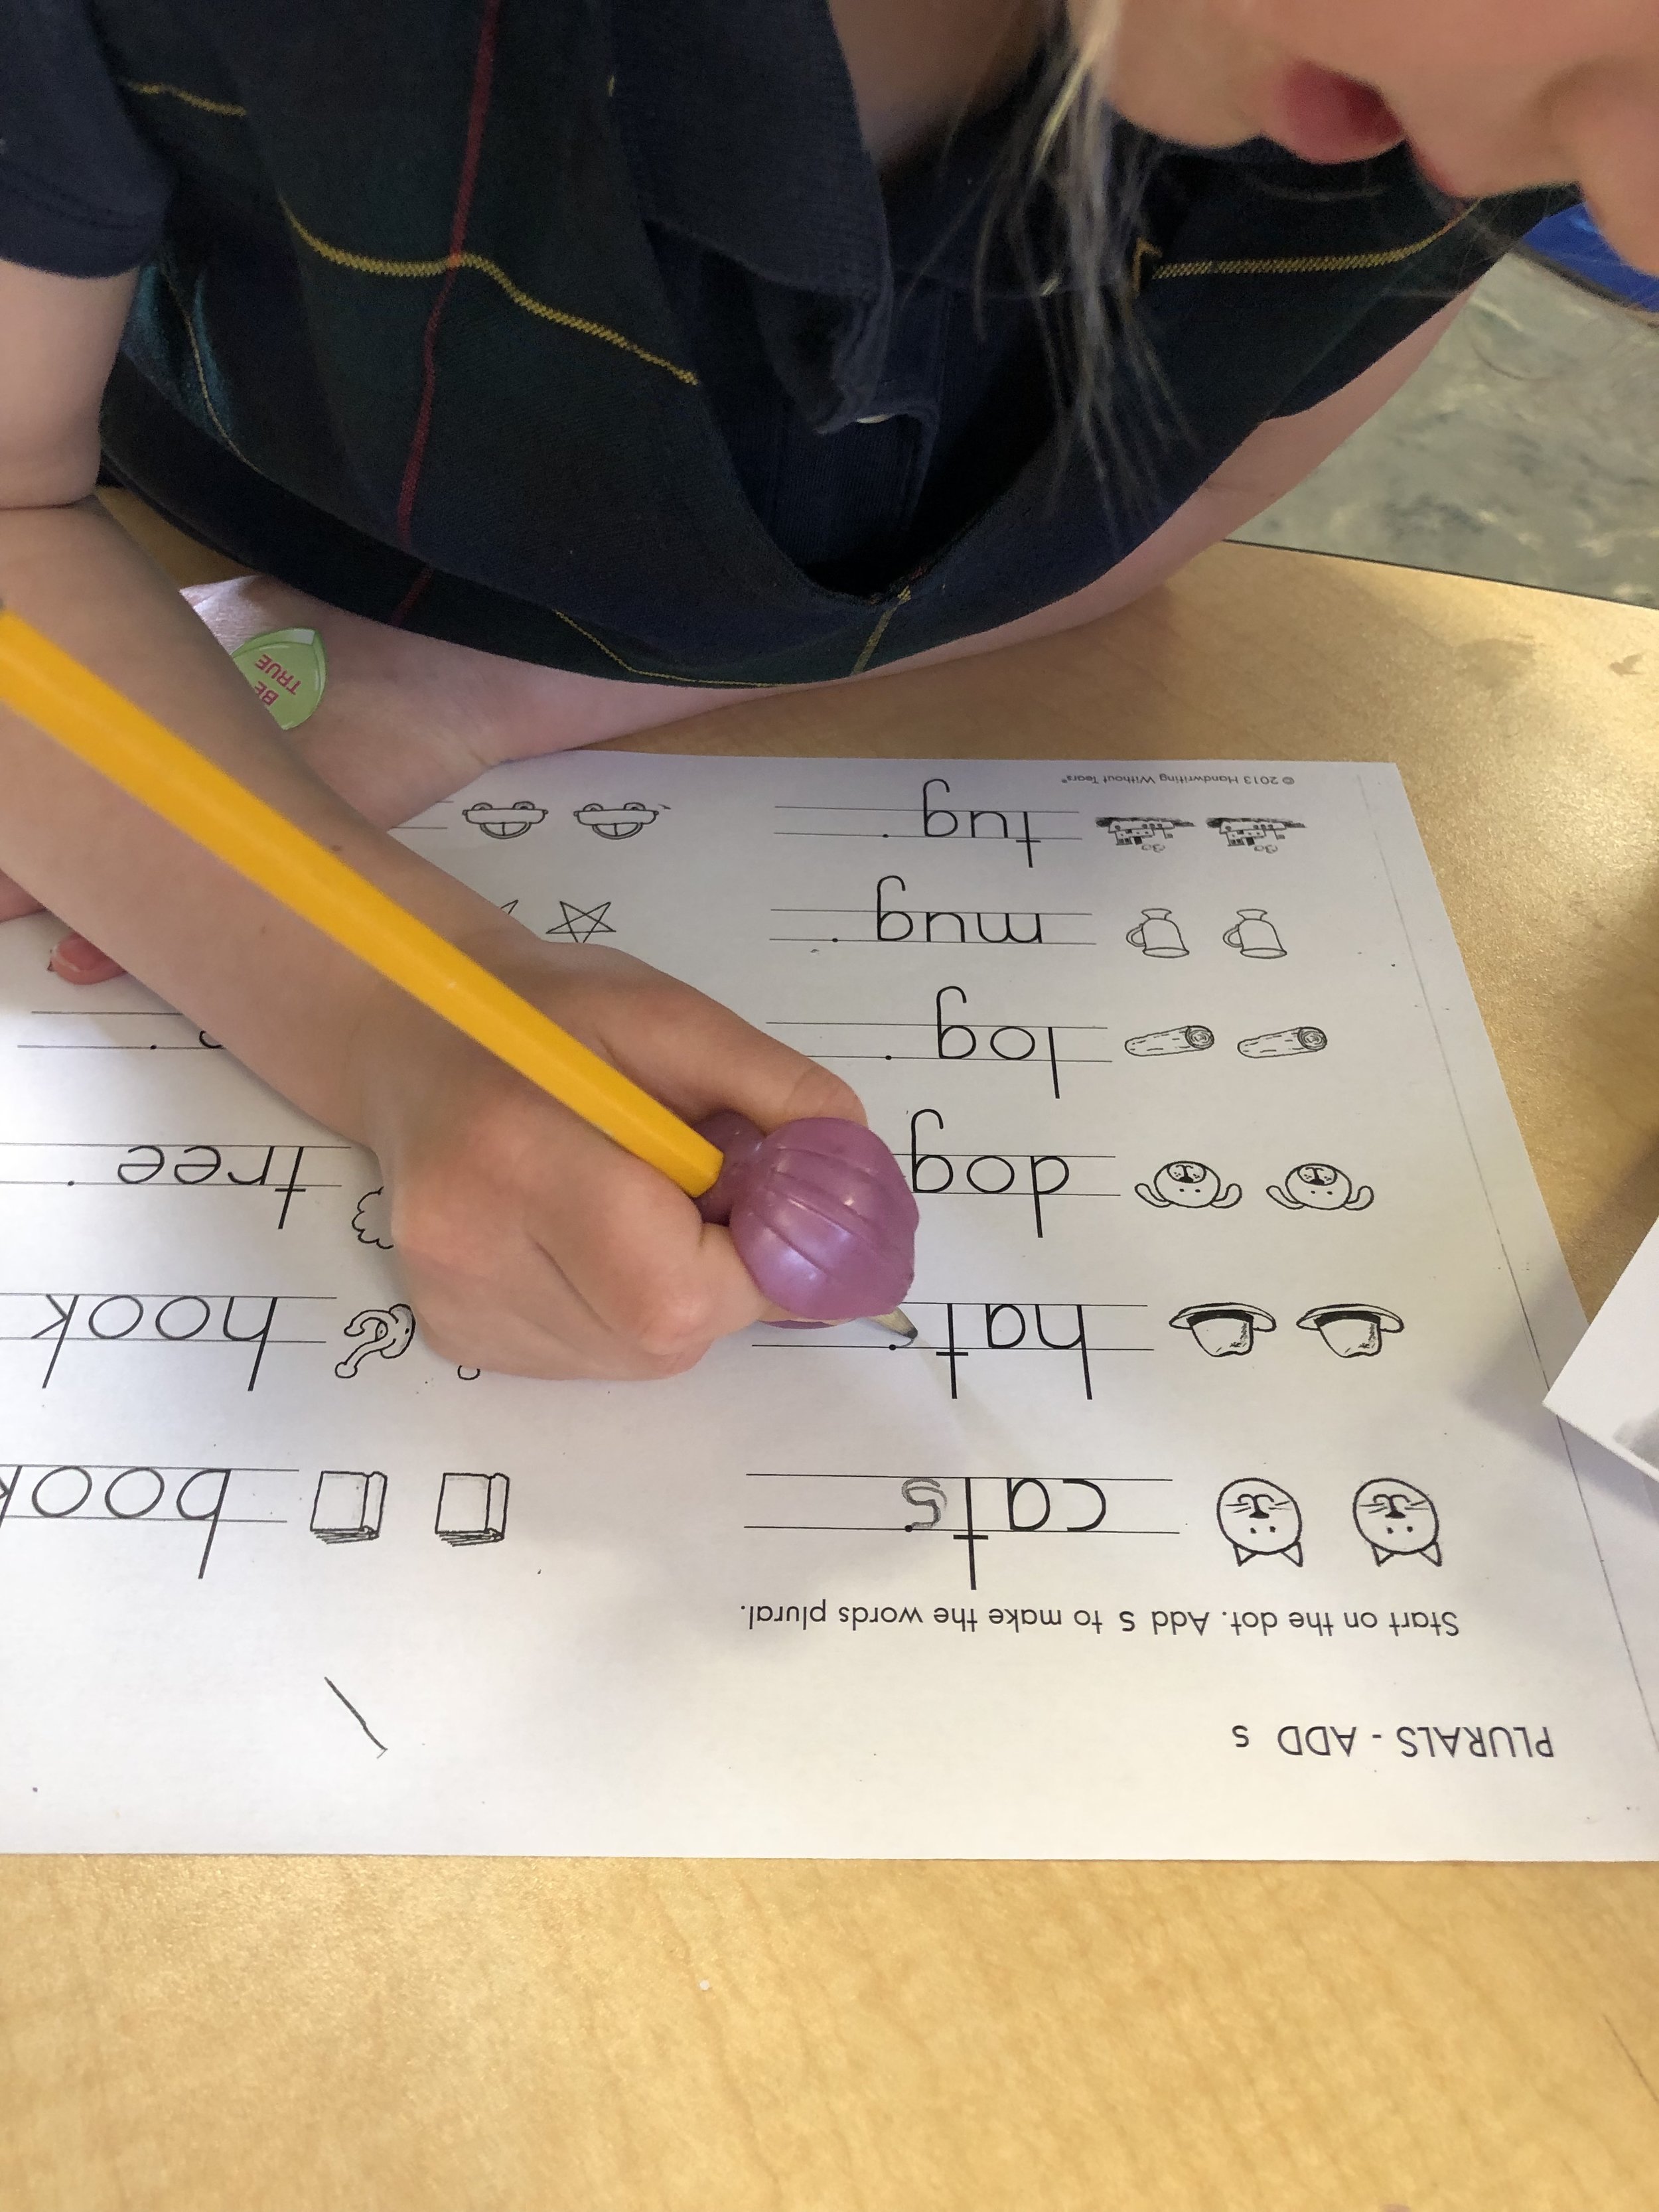
You can see some of these developmental grasp patterns at work. This last picture is of my daughter, age 5. I actually introduced a pencil grip to her to try and loosen up the web space so her hand does not grip the pencil so tightly. This grip in the picture above, can lead to fatigue when she is older and required to write more words, longer sentences, and paragraphs. Interestingly, I write like this as well and definitely experienced fatigue when writing long compositions in elementary and high school (before computers were used for word processing! Just Where in the World is Carmen Sandiego!)

So that brings me to when a pencil grip can be helpful…..

IMG_2964.jpeg

You can see the more open web space and bent thumb which is a preferred way to write to decrease hand fatigue and hyperextending the thumb.

There is a plethora of pencil grips on the market. Knowing which one is appropriate for your child can be tricky so I’ll try to help guide you but if it does not seem to help once you try a few, then getting a consultation from an OT can be helpful to further decipher what is going on.

This Grotto Grip is my favorite to help encourage a bent thumb and open webspace if kiddos age 4.5+ are still using a cylindical grasp or hyperextending the thumb instead of bending it at the joint.

This Pillow Grip is great for kids who hold a pencil too tight- this grip helps to provide some cushiony support and loosen the hand.

This Pillow Grip is great for kids who hold a pencil too tight- this grip helps to provide some cushiony support and loosen the hand.

This sampler set from Pocket Full of Therapy provides you with some options to see which grip your child prefers!

This sampler set from Pocket Full of Therapy provides you with some options to see which grip your child prefers!

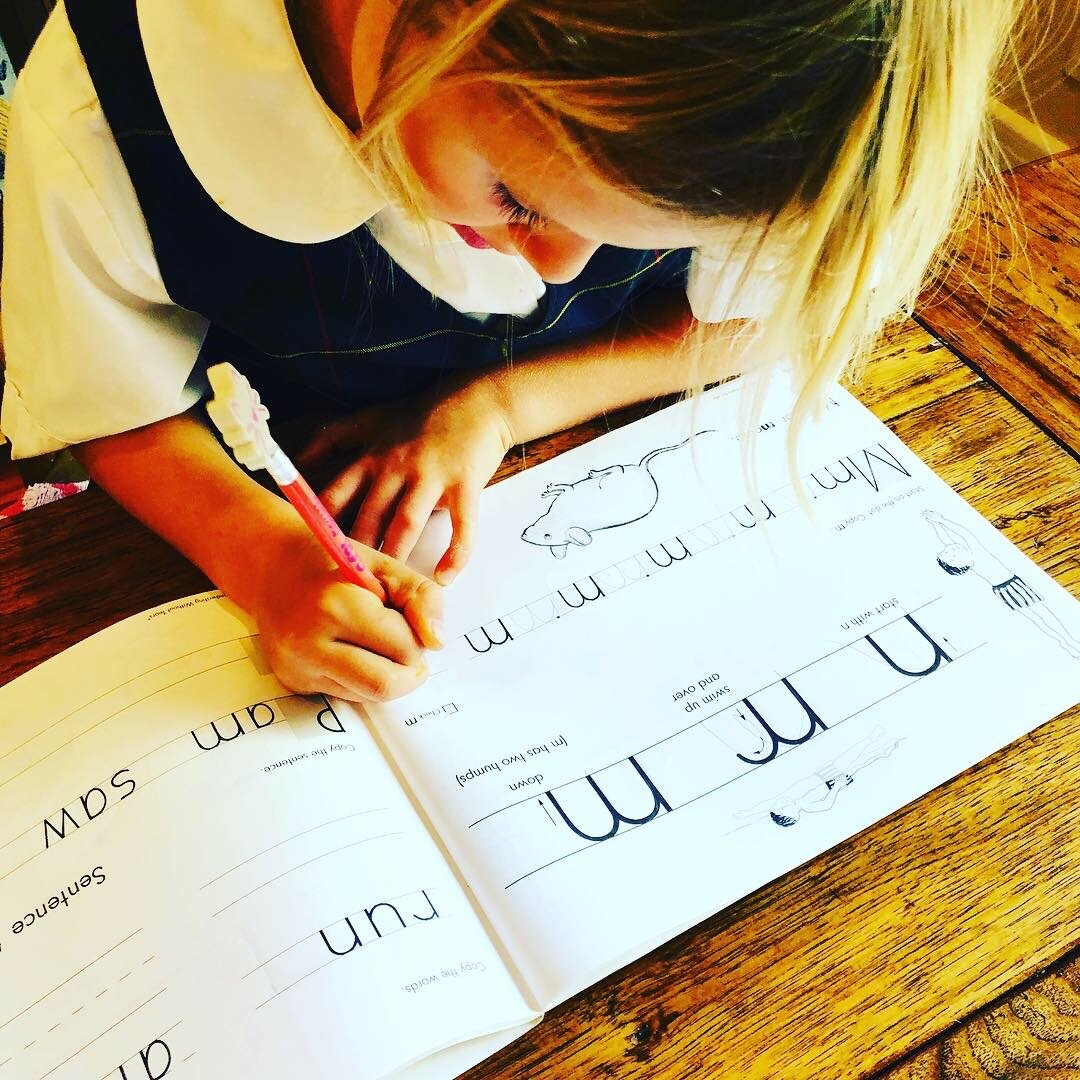
If your child is using a cylindrical/ palmar grasp at the age of 4 or shows very poor motor control such as lines being shaky, do not push them to write letters! They are simply not developmentally ready. I wrote about this point in my previous post about handwriting instruction. Now, that being said, if your child just loves letters and handwriting (remember, handwriting does not mean cursive- it refers to writing letters even in manuscript form) and you cannot stop them, use the appropriate writing utensils. The crayons posted above, sidewalk chalk, mini pencils (NOT fat pencils like almost ALL preschools and pre-k programs think are appropriate!).

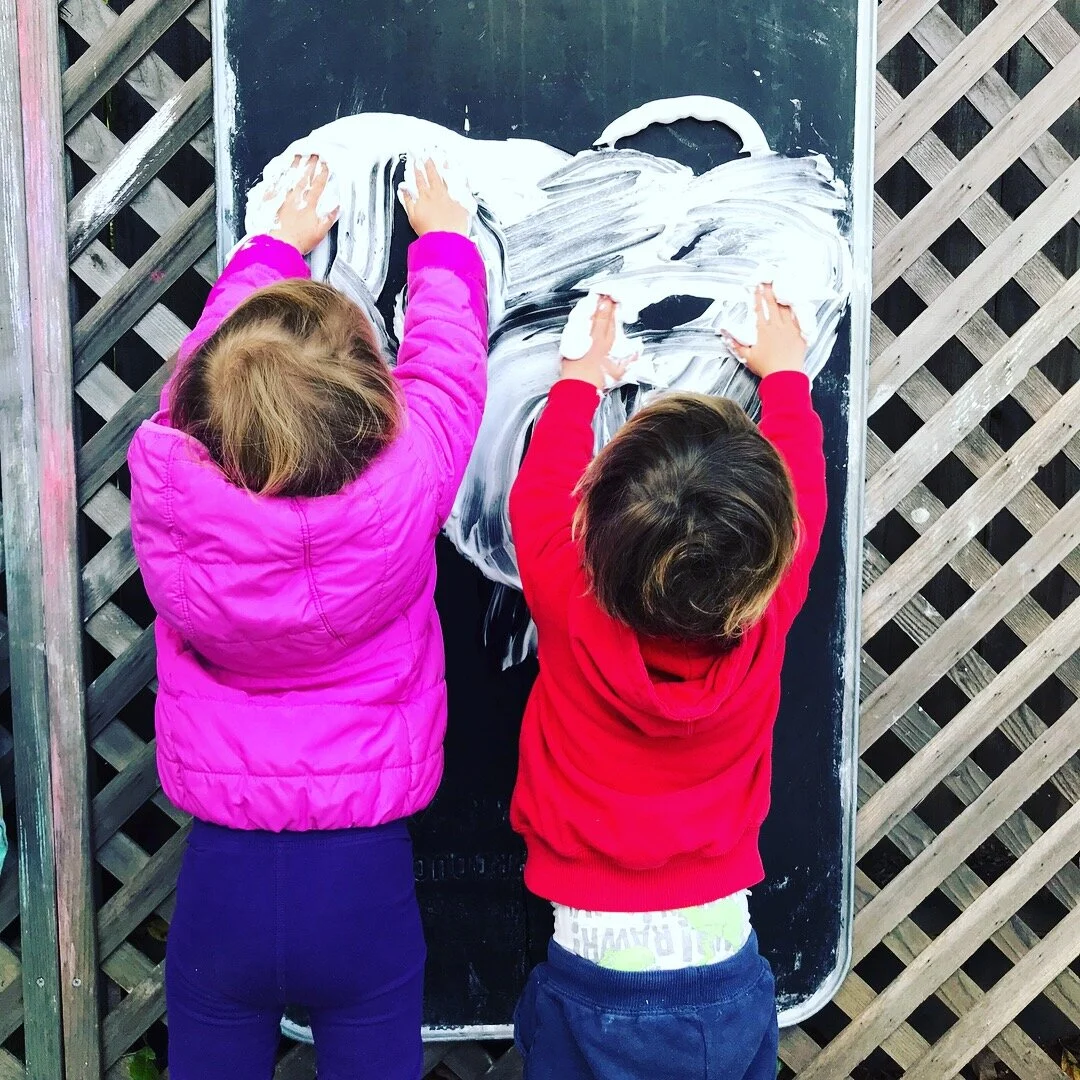
Encourage making directional lines in a salt tray or shaving cream as a first step for ages 2-4. Once those are mastered by around age 3.5 and are not shaky when done with a pencil or crayon, then you can start to draw a person. This is an important first step to help children develop body awareness and crossing midline when writing and drawing. Encourage looking in the mirror first and talking about the things you see- a face, a body, two arms, two legs, the details of the face. If they draw a person lacking a body point out their tummy on them and that the arms and legs come from that, not the head. Drawing directional lines, shapes, and a person are all important to do before even attempting letter instruction. Motivation is a big component too and if your child clearly has no interest, the effort in teaching writing is futile. Instead, talk about letters you see, letter sounds you hear in their name, letters you see around the house every day. This will help to build interest first.

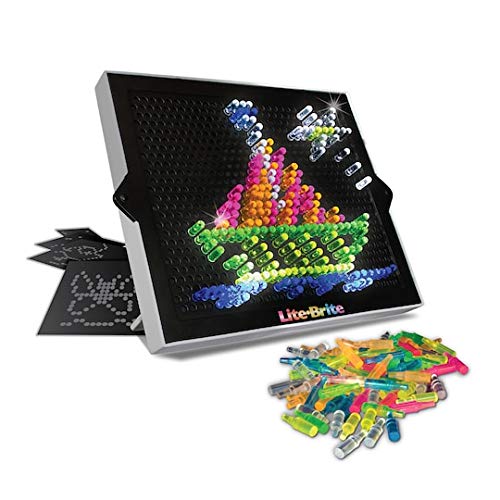
Many preschools will start to introduce letter writing with paper and pencil without thinking about if the child is developmentally ready and able to master the activities mentioned above. Instead of adopting a “by this age the child should ___” approach, I can’t emphasize enough how important it is to see where your child’s fine motor skills are developmentally. All Kindergartens are teaching letter instruction and writing without assessing the child’s hand strength. This is STILL an important factor. Hand strengthening activities should still be done such as using theraputty, play dough, yoga that involves bearing weight on the hands, animal walks such as doing the crab walk, monkey bars, and teaching skills like buttoning, Lite Brite and using tongs. You will know if your child lacks the proper hand strength if they have difficulty buttoning, opening containers, an irregular or immature grasp on the pencil, poor fine motor control (letters are shaky).

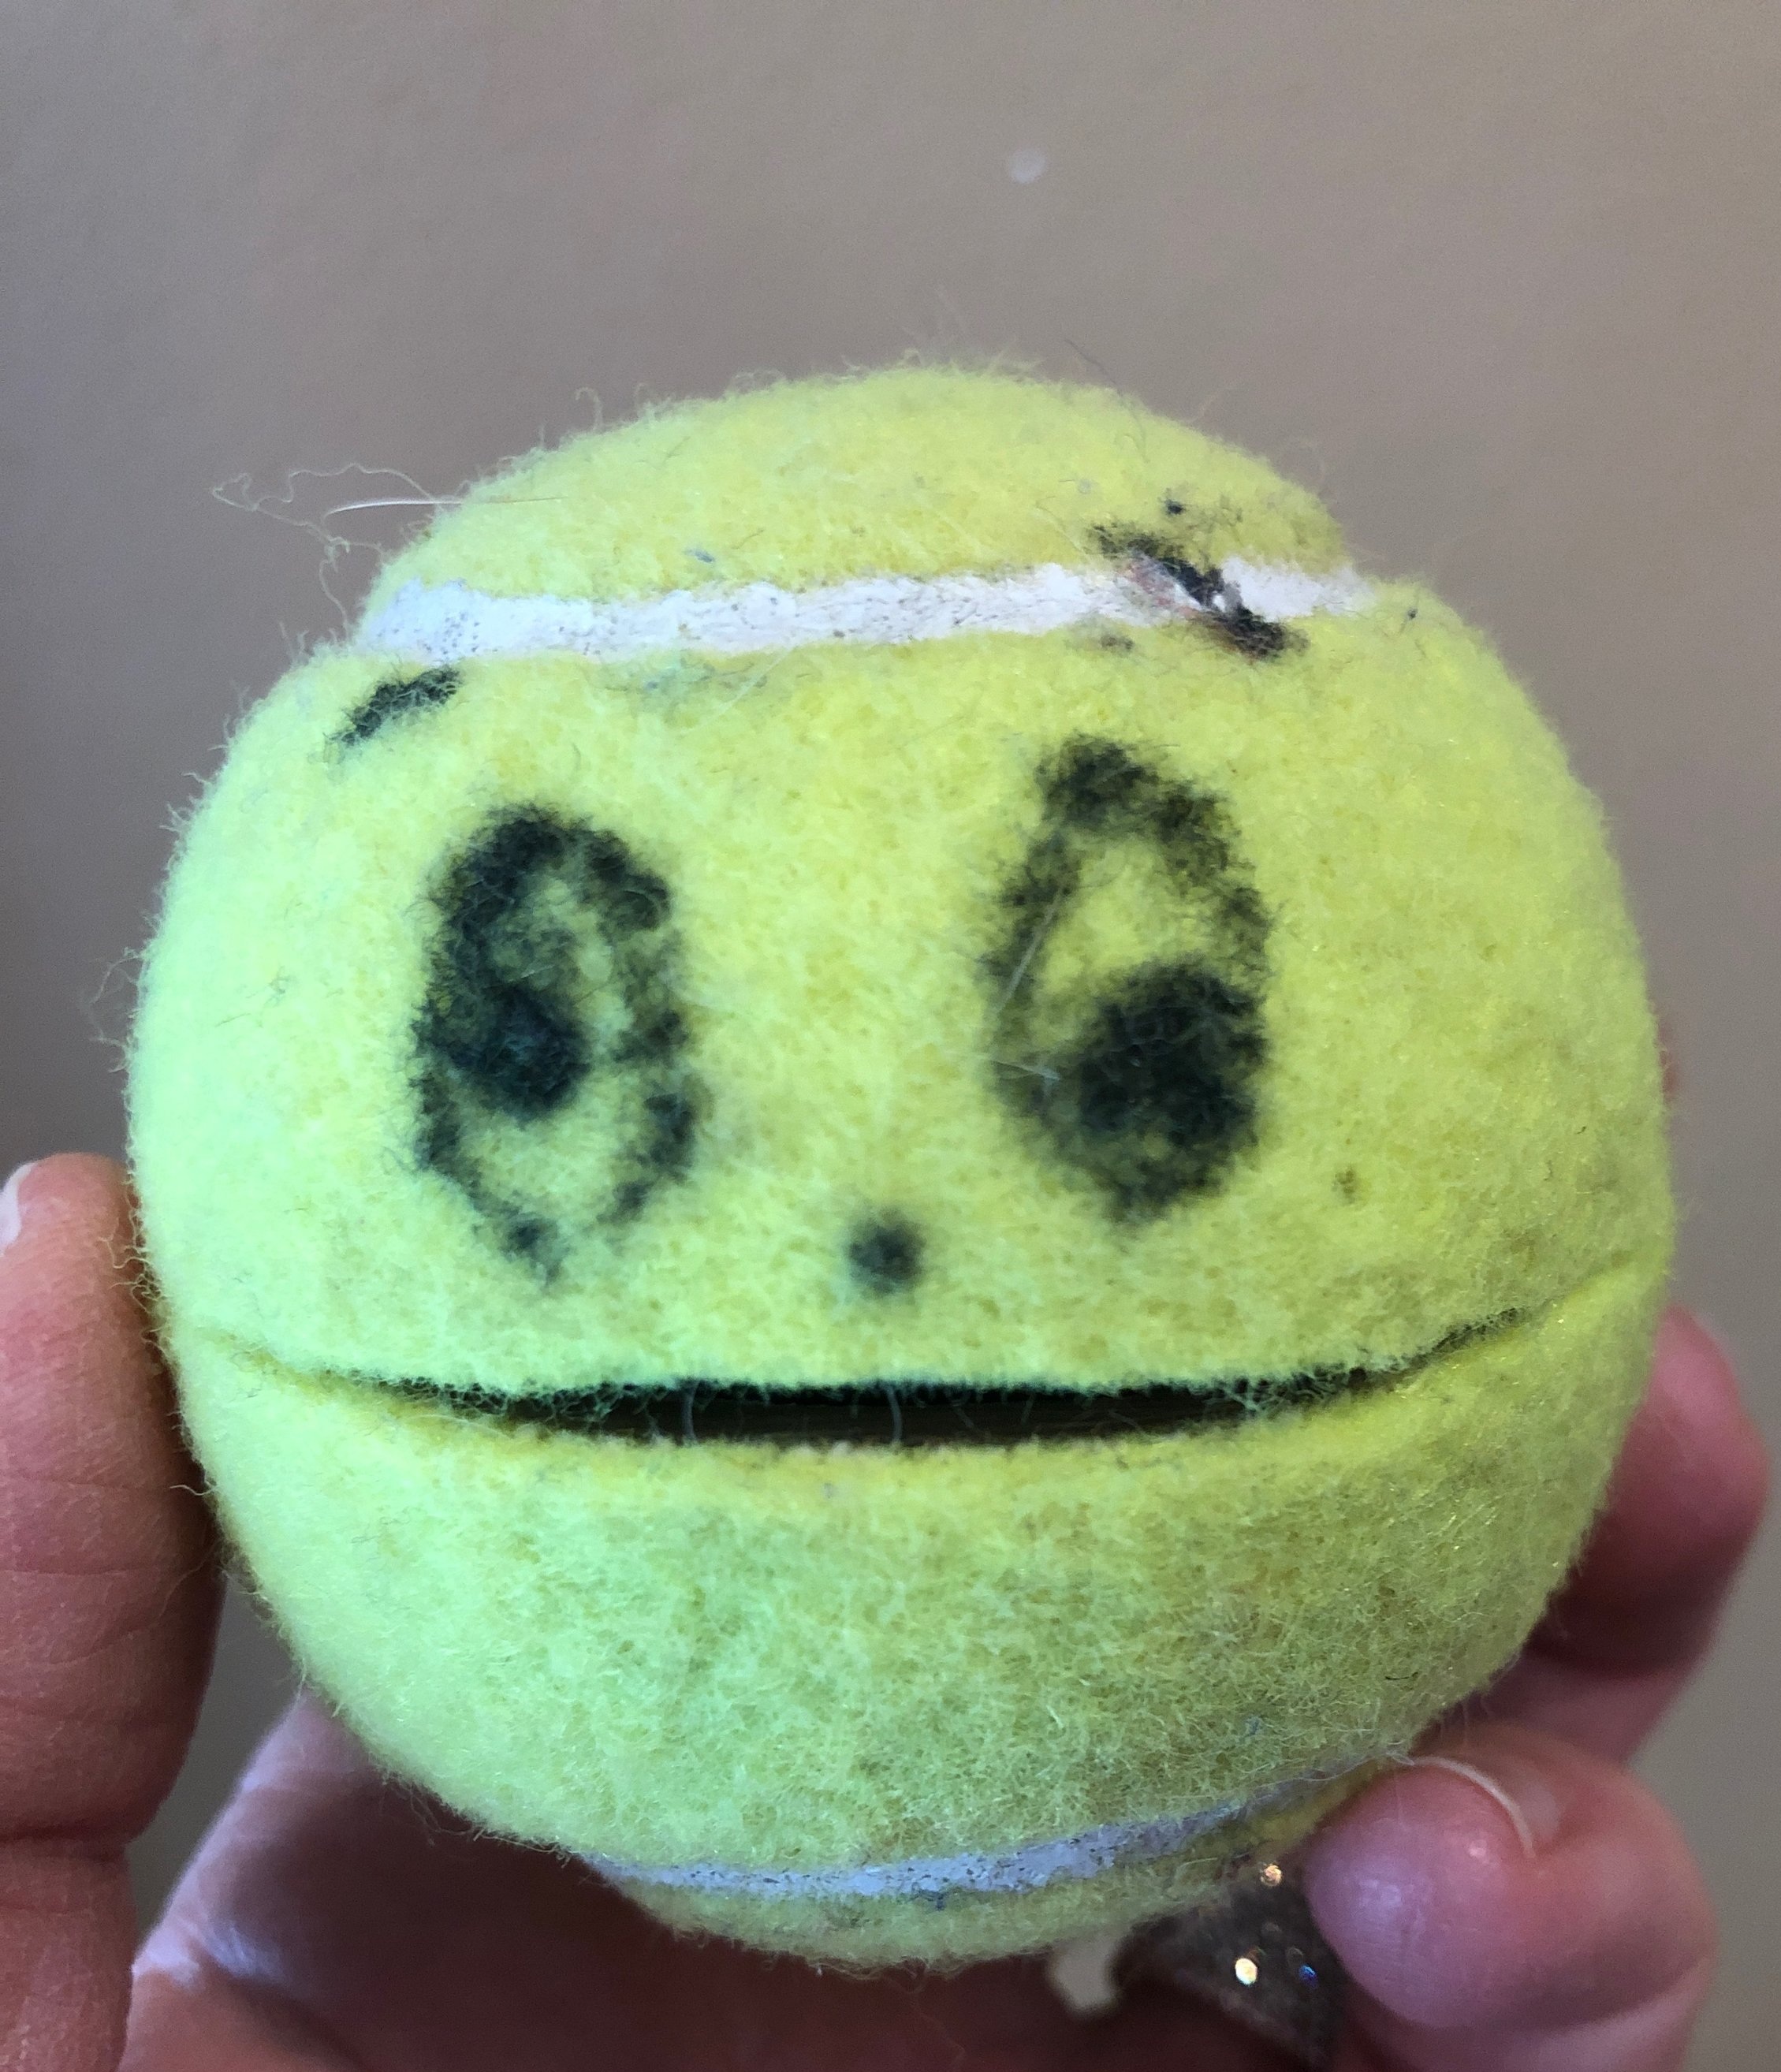
Tennis Ball man is always in my therapy bag! This is the best thing for hand strength- squeeze open his mouth and feed him pennies! Make sure that the thumb is bent rather than hyperextended when squeezing open!

Tennis Ball man is always in my therapy bag! This is the best thing for hand strength- squeeze open his mouth and feed him pennies! Make sure that the thumb is bent rather than hyperextended when squeezing open!

So when should you intervene with writing and practice at home aside from what kids are learning at school?

I encourage practicing writing in an engaging and fun way for preschool and kindergartners - making letters in the sand at the park or beach, sidewalk chalk, in novel and unexpected ways. This added tactile component also helps strengthen motor memory. For older kiddos, I do recommend that practice happens at home in addition to at school if letters are being started at the bottom, are backwards, letter formation is their own “inventive” way, and if legibility is just not there in 1st or 2nd grade. When children do not practice writing and the task demands continue to grow throughout elementary school, children have more difficulty keeping up with the assignment. Children will then begin to dread writing assignments which accounts for close to 50-60% of the school day! When their frustration increases, performance decreases and with it, so does legibility and comprehension. There are so many ways to infuse writing activities into the day in a fun way. If your child has an irregular grasp at age 4/4.5, I encourage correcting it every time even when they are coloring. With the right materials, it should be easy for them to hold a crayon with an emerging tripod grasp. I also have a little OT trick… Have your kiddo hold a pom pom tucked into their palm with their pinky and ring finger so they are not able to put those fingers on the pencil or crayon!

If your child is switching hands when writing or coloring, they are likely avoiding crossing midline. If a child begins with the right hand and switches to color something on the left side of the paper I will remind them that they started with the other hand and have them switch back. When playing, strategically place items on one side of their body such that they must reach over, across their midline to the other side.

Tell me, what are your favorite ways to encourage and practice writing? What other questions do you have! Comment below! Helping you is why I love writing these posts…

Nature Deficit Disorder

I first heard about Nature Deficit Disorder when Jon Young, author of Coyote’s Guide to Connecting with Nature, spoke to the parents of my daughter’s preschool. Being a nature-based school, we were a captive audience and already living this lifestyle with our kiddos, at least while we were at school. It made me start to re-think my therapeutic approach and the healing benefits of being outside. Thus, OT OuTside was born!

What is important to remember about combatting Nature Deficit Disorder is purely- get outside. It does not mean you need a forest and a stream to frolic in. It is about getting outside no matter where you are or what “nature” surrounds you. It could be just walking outside and noticing the wind on your face. Picking up leaves on a city sidewalk, visiting your local park, drawing on your driveway with sidewalk chalk. Outdoor experiences and play do not need to be elaborate or how to construct a fort out of branches. The simple act of mindfulness about the outdoors and noticing how you feel when your body is outside can do wonders! It’s building this lexicon in your child’s vocabulary and helping them check-in with the way their body feels when they are outside and exploring. This will help to build their desire to seek out and respect nature and the environment now and in the future.

I have recently seen the need for nature even more. As I enter classrooms and work with children, the lack of stamina that children have for sitting, focusing, writing, working together, and thinking outside the box is palpable. I don’t have all the answers about why this is. Research will tell me what I want to read- whether the research is pro-nature or if the research is about the merits of app-based curriculum. Both sides of the coin will share the benefits of their side. The research does however, unanimously suggest that children (and adults) are spending less time outdoors and the result is impacting behavior and motor development. What I do know from over 10 years in the field of OT and working with children and working in schools- development is lacking. Angela Hanscom cites much of the research in her book and I witness it firsthand. I see more and more children with decreased hand and shoulder strength. More children cannot sustain their attention. Most of the class cannot sit still or even sit upright. More children are reversing letters and not forming letters correctly.

I hypothesize that we are losing sight of the foundational skills. We are asking kids to do more without preparing them with foundational skills. We all feel the pressure, really wherever we are geographically, to enroll our babies in music class, enroll our school-age kids in sports, to be sure they are “ready” for kindergarten. There is nothing wrong with sports or music- I have done both with my kids- it is when these activities replace unstructured, risk-taking play time outside. The sad thing is that we feel that “ready for kindergarten” means reading and writing. It is so much more than that. It is looking at developmental skills. I challenge you to rethink this. Instead ask yourself:

  • is my child able to climb the ladder on the play structure?

  • do they follow a multiple step sequence at the playground?

  • do they wait their turn for the swing or slide?

  • do they flatten out play dough and roll it out or is that a challenge?

  • do they make directional lines (horizontal, vertical, slanted) and simple shapes with clear angles and corners?

  • do they cut with scissors or is their cutting jagged?

  • do they tolerate being in a group?

  • do they tolerate different textures and materials?

  • do they follow someone else’s plan?

  • do they color with a fist on the crayon or are they showing an emerging grasp?

  • do they open food containers independently?

  • do they pull up their pants independently?

  • do they wipe themselves in the bathroom?

    These are just a sampling of the developmental skills that need to be in place before kids are asked to sit for more than 20 minutes at a time in a classroom, write words, read sight words and sentences, and follow a teacher’s plan for 4-8 hours. So how do we do this? How do we say no to the pressures around us and focus on what is developmentally appropriate for kids of all ages? How do we balance that time for unstructured play time that allows children to take risks and build executive functioning skills- one of the biggest predictors of a child’s IQ, moreso than a child’s reading ability in Kindergarten.

    That balance comes from finding time outside in nature. Being outside changes your cortisol (stress hormone) levels. The natural light changes moods. Endorphins get raised. When we are having fun and laughing with our children, oxytocin increases in both parent and child. It helps us refocus on the basics rather than the academics or the daily pressure of the “shoulds.” My child “should be doing ____, I should be doing ____…” we all have these lists. A mindful practice outside focusing on the senses brings us back to the present. Breathing and listening makes us feel that balance and intention that we crave. It might be fleeting but over time it becomes normal and what our body seeks each day. Allowing children time outside, even (gasp) away from parents, will help to nurture these developmental skills, executive functioning skills, problem solving, teamwork, cooperation, navigating social situations, and most importantly learning and trusting in what their body is capable of.

In addition to Jon Young, many others have written about Nature Deficit Disorder, such as Richard Louv, who introduced the concept in Last Child in the Woods. OT and founder of TimberNook, Angela Hanscom writes about the effects of Nature Deficit Disorder in her book Balanced and Barefoot. Here are a sampling of some of those great reads…

So tell me, what do you notice when you spend even a few minutes outside? What are some of your favorite activities to do out in the open? If you missed my post about my favorite outdoor activities, be sure to check it out!


References

https://www.bbc.com/news/science-environment-38094186

https://greatergood.berkeley.edu/article/item/how_to_protect_kids_from_nature_deficit_disorder

https://www.miragenews.com/outdoor-play-at-home-key-for-young-childrens-health-and-development/

http://richardlouv.com/